SLATZ® CAPTURE
FOR PAPER & ENGRAVED INSERTS
FOR PAPER & ENGRAVED INSERTS
SLATZ®
CAPTURE
FOR PAPER & ENGRAVED
INSERTS
CAPTURE
FOR PAPER & ENGRAVED
INSERTS
MODULAR FLAT SIGN SYSTEM
No cumbersome components. No visible fasteners.
No bulky apparatus to hold a simple piece of paper.
MODULAR FLAT SIGN SYSTEM
No cumbersome components.
No visible fasteners.
No bulky apparatus to hold a simple piece of paper.

Capture was designed to meet the challenge of change. In response to customer demand for a flat insert option, we have combined the structural integrity of SLATZ® extruded aluminum and injection molded plastic components with the ease of paper insert flexibility to produce a highly desirable, quick-change, sign system. Available insert materials include: acrylic, photopolymer, engraving stock, zinc and more!
Slatz® Capture directories and wayfinding signage can be fully integrated with ADA compliant room identification signage for multi-functional communication with staff and visitors alike.


Removeable insert capabilities give the end-user more control and satisfaction than ever, enabling them to make changes at will.
FEATURES
Mounting
Capture can be mounted vertically or horizontally using matching end-caps that work as a finishing feature. A capture directory is hung as a unit with faceplates mounted on multiclips in sidetracks.
Color
Capture is available in silver anodized finish or standard industry colors achieved with our vinyl ColorfixTM System using Avery® A-900 Series vinyl or it can be painted.
Assembly & Installation
Capture signs and directories are simple to assemble and install. A pencil, level, drill and screwdriver or VHB tape are all you need.
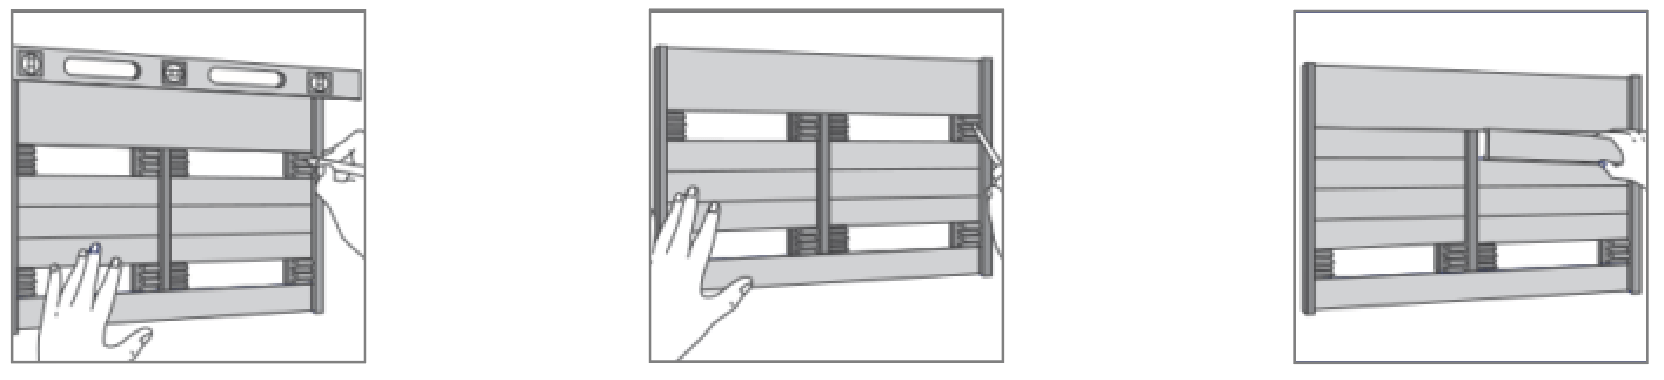
Insert Removal
To change a paper insert, remove the clear plastic lens with suction cup provided and lift paper out. Change rigid insert by lifting the extrusion off the end cap or multiclip and sliding the insert out.
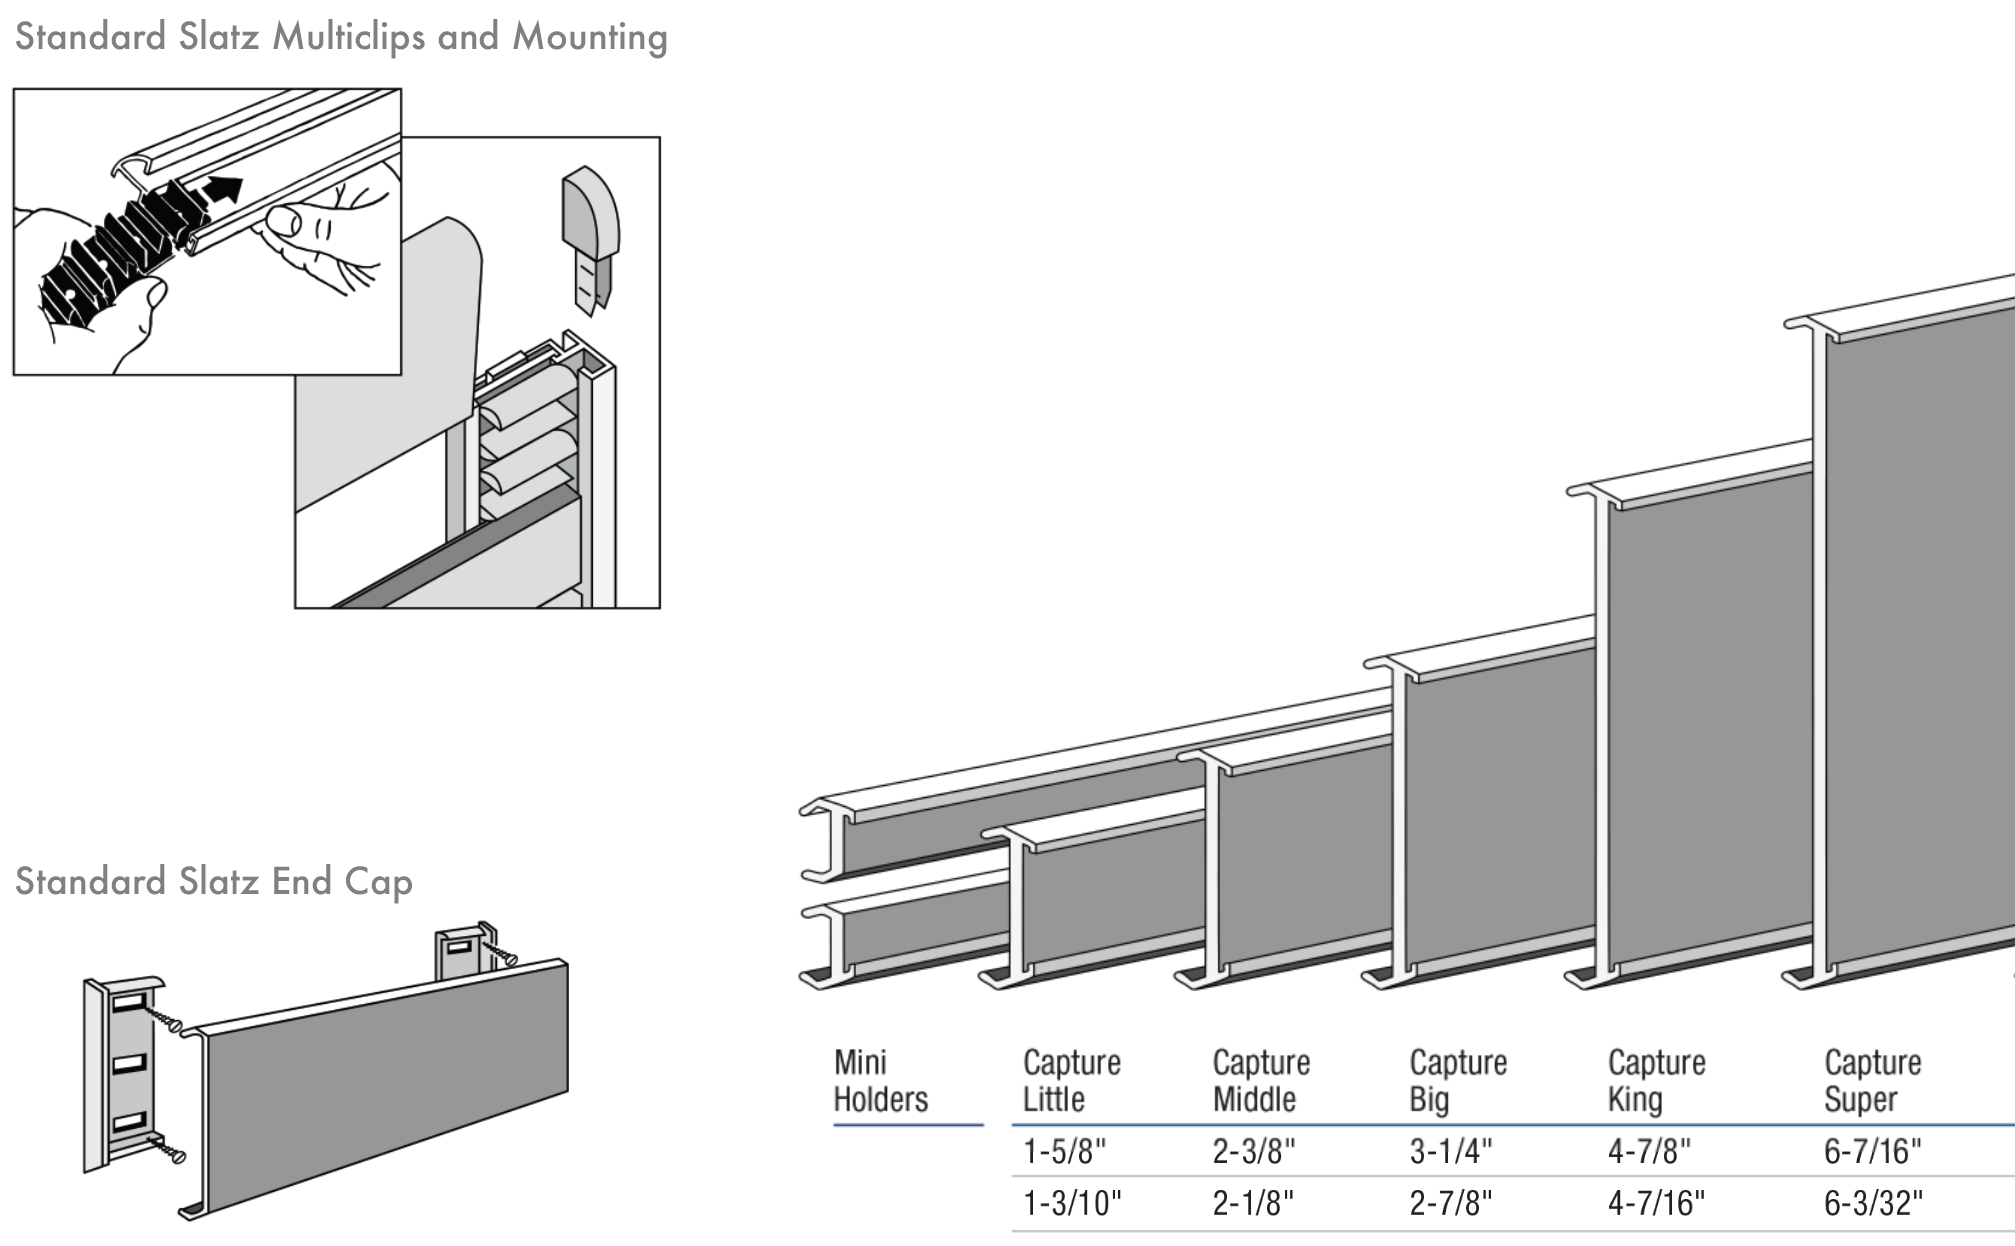
For inserts exceeding the size of the Super extrusion, use a pair of Slatz Mini-Holders, placed top and bottom. This enables you to create space for a large, flat surface, allowing you to position an expanded graphic or engraving into a Slatz directory or other configuration.
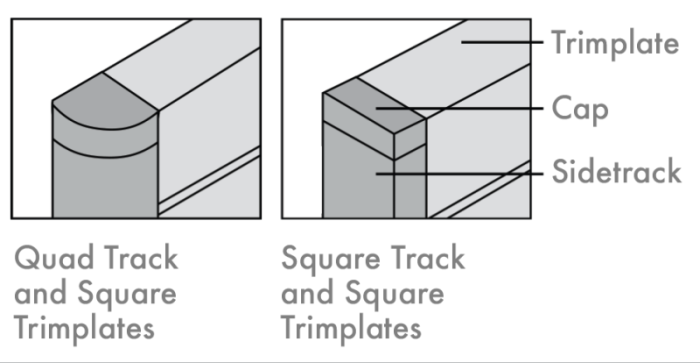
Framing options require two selections: trimplate and sidetrack.
Wall/Door Signs
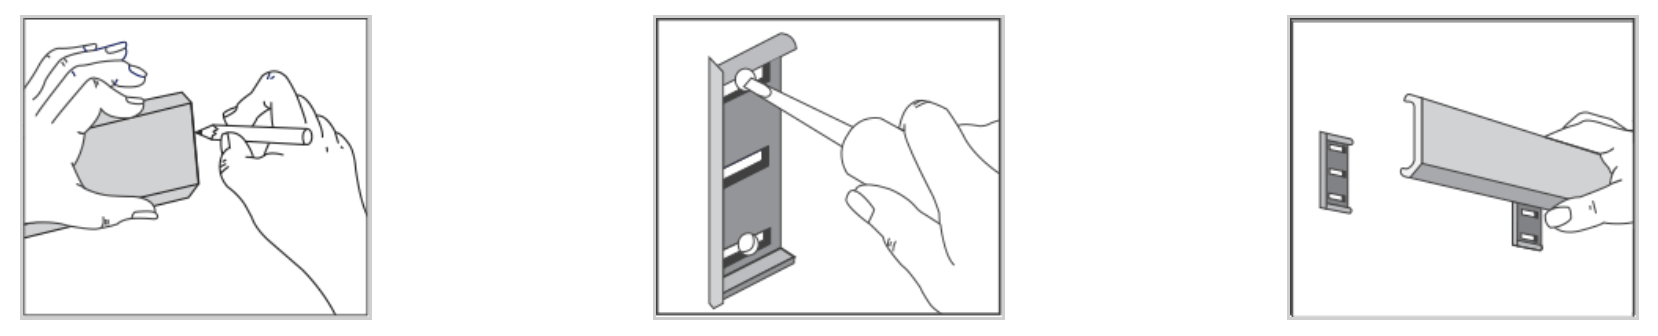
Hold plate on wall at desired location. Mark sides and corners.
Remove end caps. Hold caps to corner markings and mark end cap mounting holes.
Drill holes, insert anchors, and fasten caps to wall.
Do not fasten tightly; allow for minor adjustment. Snap faceplate into place.
Single-Column Directories
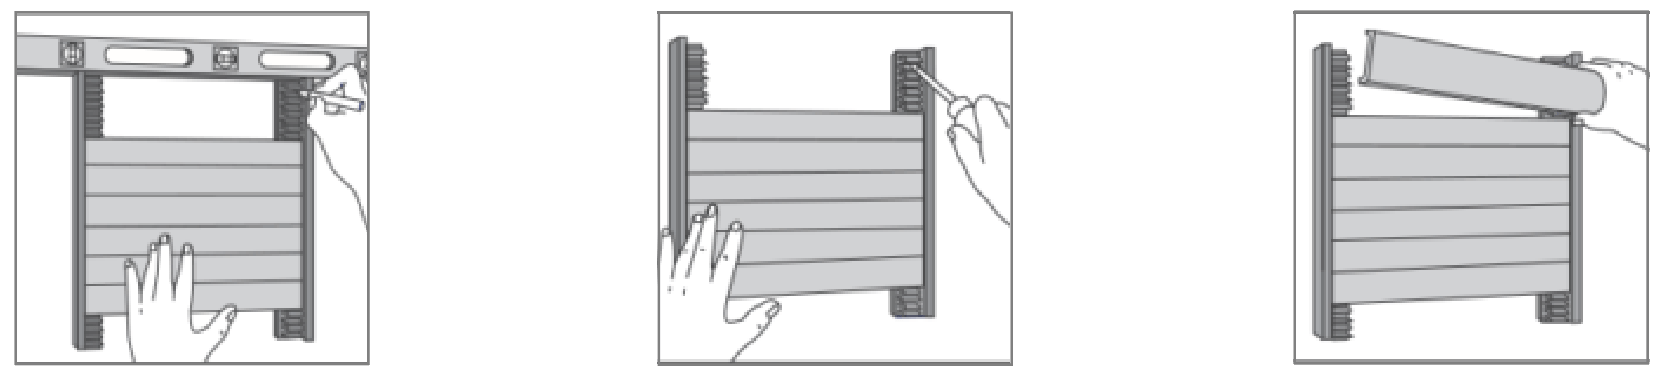
Remove plates, where shown, to expose mounting holes.
For taller directories, check the tracks for additional holes.
Position on mounting surface, level, and mark holes. Drill holes in wall where indicated and insert anchors.
Line directory up to holes and fasten with screws. Replace plates.
Multi-Column Directories
Remove plates, where shown, to expose mounting holes.
Position on mounting surface, level, and mark holes.
Drill holes in wall and insert anchors.
Line directory up to holes and fasten with screws.
Replace plates.
Flush-Mount Ceiling Directories
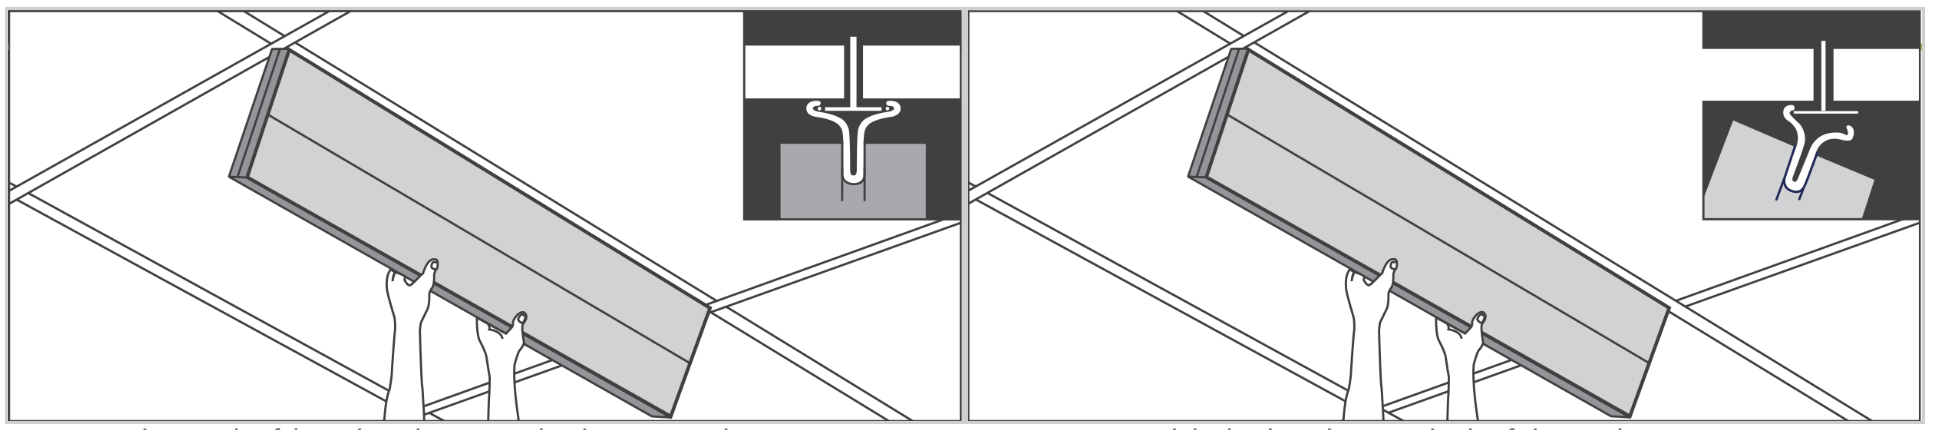
Hook one side of the ceiling clips to metal ceiling strip as shown in inset.
Finish by hooking the second side of clips as shown in inset.